
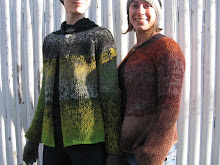
The Button Coil is knit as a long, cabled strip. The cable does not look the same on both sides, but it is visually interesting on both sides (see the fourth photo below for a good look at the reverse side). I believe this is an important characteristic for a casually worn accessory like this, because who wants to think about how to style this thing? Pull it on and KNOW it looks good!
I recently completed a second Button Coil. This one is worked in Sundara DK Silky Cashmere, which creates a very different drape from the original version. I went down to US size 7 needles for this version, and I used two skeins.
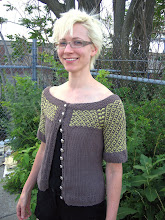
If you look closely to the left of the cables, you can see the buttonholes that are worked in the ribbed edging.

Once you've knit your long strip, it's time for the best part: choosing buttons. I was fortunate to have my Button Coil with me at Rhinebeck, where I found the purple glass "eyeball" buttons below at the Shipyard Point Glassworks booth. They didn't have 12 buttons of this type on hand at the show, but it was very easy to custom order them! They arrived a few weeks later. Perfect.
(Note that there are actually 15 buttons below. I have no idea how I determined that I needed 15 buttons rather than 12, but now I have three extras for a future project.)
 Line up the buttons across from the buttonholes as indicated in the pattern. Mark the points at which to sew the buttons, and sew them on.
 When the buttons are attached, you are ready to button. With the button edge on top (as shown below) and the buttonhole edge on the bottom, coil the strip around, matching the first buttonhole with the first button you encounter. Note: This is how to wrap the coil as tightly as possible. It can be wrapped more loosely, more sparsely, or not at all. Also note how nice the reverse side of the cable looks. Super!
 Continue to coil and button, matching the buttonholes with the buttons.
 You can get up to three wraps!
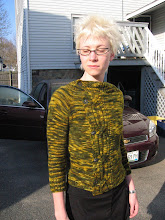
And the final product!

This piece has a more luxurious feel to it than the original, thanks to the ultra soft yarn and exquisite buttons, which make little clicky glass sounds as they touch. Wear with your army surplus jacket, your black wool coat, or your grey hoodie and yellow striped t-shirt.
The pattern is available as an individual download for $5 here, and is also included in the Craft Work Knit book and ebook. Enjoy!


2 comments:
That scarf is just gorgeous!
Those buttons are Turkish nazar boncu, evil eye beads to keep away evil eye. Very useful!
Next time I go, I'll procure you a stash. :)
Love the button tutorial and the eye buttons.
Post a Comment