Thursday, January 6, 2011

Everything Old Is New Again but Made to Look Old


Manufacturing gets me down. Above, my Doc Martens from 1991. Made in England, purchased from a mail-order company in California because at the time I lived in Grand Rapids, Michigan, and Doc Martens weren't available there. My first big purchase with the wages of my first real job: School Janitor. They cost $110. I was 14.

I wore them everywhere in high school, then in college, after which I began to alternate them with several other pairs of favorite boots. They've been with me for over half my life, have lived in every city I have, and have even traveled overseas with me.

Because I love them, and because they are looking very worn, I looked into buying a new pair, a black pair. I learned that they are now made in China (I was tipped off that something was wrong when I realized they cost just a bit more than $110 now, 20 years later). You can even buy them with a "worn" look. Behold.

There's a "remarkable wearing-in process" taking place in Chinese factories to produce boots of mediocre quality (NOW I realize why so many people have recently told me that their Doc Martens fell apart very quickly. I wondered what they could possibly be doing to their shoes). That's so sad to me.

It looks like I still have a chance to purchase the black ones I want from the original factory here. I'll take 20 years of boot made in England for $100 more; would you?

Monday, January 3, 2011

Oh nooooo 2011!

When attempting to take a photo of my sister wearing a brand new Wham Bam Thank You Lamb cowl that I whipped up out of some black Schaefer Kathleen, this happened to my camera:


Okay, so the camera dates back to 2004, but post-holidays is never a great time for unexpected expenses. Fortunately I got some nice photos of a few simple designs I'll be publishing over the next month or so, including this one:

As soon as I can get this into my new InDesign template, it will be up!

Monday, December 20, 2010

The Design That Ate My Fall


Here are just a few of the swatches of my very first intensely cabled design. I worked on this project while at Rhinebeck, in Itaca, in Toronto, and at various events in Boston. I worked and ripped and worked some more. Finally, the finished product, modeled outside the Mutter Museum in Philly:


The other day I got the awesome photos from the Sanguine Gryphon:


It's called Ambergris, named after a chapter of my favorite novel, Moby Dick. I created it for the Sanguine Grphyon's winter line of patterns. I wanted to use traditional fisherman's sweater cables and construction, with a decidedly whale-based theme (whale tail cables up the front, rope and chain cables, and even little harpoon-like ribbing up the sides) and a fitted, flattering shape for women.


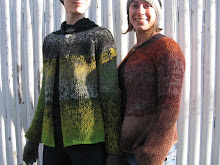
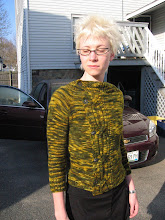
It's worked in Free Range, a DK-weight organic wool that is FABULOUS, and is sized from 34" to 54" busts. The sample is modeled by two people who each have a 32" bust, so it's modeled with about 2" of positive ease in the photos above. You can purchase the pattern here. It's a really fun knit, and made me feel super accomplished.

Sunday, December 19, 2010

Gimme gimme gimme, I need, I need

Am I the only one who feels like everyone needs something from me as the holidays approach? That every company is going for some final little push before vacation? If you're sort of a freelancer like I am, that's a whole lot of little demands.


My weekend was full of editing and knitting work, but all from the comfort of my couch.


Add Christmas tree and Yule Log. It's just about manageable.

Tuesday, December 7, 2010

Button Coil How-To

The Button Coil: I've gotten a lot of questions about this one, and I've seen a lot of eyes glaze over as I demonstrate it at trunk shows. This post is a step-by-step explanation of the cowl/scarf/coil. With buttons. Here's the original, which was worked in Dream in Color Classy Worsted in Good Luck Jade. It takes about 2 skeins, and was knit on US size 8 needles.


The Button Coil is knit as a long, cabled strip. The cable does not look the same on both sides, but it is visually interesting on both sides (see the fourth photo below for a good look at the reverse side). I believe this is an important characteristic for a casually worn accessory like this, because who wants to think about how to style this thing? Pull it on and KNOW it looks good!

I recently completed a second Button Coil. This one is worked in Sundara DK Silky Cashmere, which creates a very different drape from the original version. I went down to US size 7 needles for this version, and I used two skeins.

If you look closely to the left of the cables, you can see the buttonholes that are worked in the ribbed edging.


Once you've knit your long strip, it's time for the best part: choosing buttons. I was fortunate to have my Button Coil with me at Rhinebeck, where I found the purple glass "eyeball" buttons below at the Shipyard Point Glassworks booth. They didn't have 12 buttons of this type on hand at the show, but it was very easy to custom order them! They arrived a few weeks later. Perfect.

(Note that there are actually 15 buttons below. I have no idea how I determined that I needed 15 buttons rather than 12, but now I have three extras for a future project.)

Line up the buttons across from the buttonholes as indicated in the pattern. Mark the points at which to sew the buttons, and sew them on.

When the buttons are attached, you are ready to button. With the button edge on top (as shown below) and the buttonhole edge on the bottom, coil the strip around, matching the first buttonhole with the first button you encounter. Note: This is how to wrap the coil as tightly as possible. It can be wrapped more loosely, more sparsely, or not at all. Also note how nice the reverse side of the cable looks. Super!

Continue to coil and button, matching the buttonholes with the buttons.

You can get up to three wraps!


And the final product!


This piece has a more luxurious feel to it than the original, thanks to the ultra soft yarn and exquisite buttons, which make little clicky glass sounds as they touch. Wear with your army surplus jacket, your black wool coat, or your grey hoodie and yellow striped t-shirt.

The pattern is available as an individual download for $5 here, and is also included in the Craft Work Knit book and ebook. Enjoy!

Wednesday, December 1, 2010

No. Sleep. Til Brooklyn!!!

Toromorrow I catch the bus to NYC, get a haircut and a dye job at Astor Place Hairstylist (my hairstylist from 1995 to 1999), talk at Knitty City, go out for drinks with anyone who's up for it, and crash at a hostel in Brooklyn! In the NYC area? Come see me!

Tuesday, November 23, 2010

Get your Albers Shawl for $44.40


So I was just browsing the Web, looking at yarn colors and fibers for some new designs, and noticed that Purl Soho has Jade Sapphire Lacey Lamb, the yarn I used for the Albers Shawl, on sale for $11.10 a ball. One ball in each of four colors and you'll have hours and hours and HOURS AND HOURS of knitting entertainment, and someday a finished object that people will want to buy right off you.

I feel like I just found a great yard sale or something.

Check it out.

The pattern is here. That's a total of $49.40. Just sayin.